
How To Add Outlets To A Garage Workshop Safely
A garage workshop runs on power, and the outlets you install decide how well that space actually works for you. Most garages get built with one or two basic receptacles, which falls far short of what a serious woodworking bench, welding station, or tool wall needs. Adding outlets sounds simple on the surface, yet the job involves load calculations, correct wire sizing, proper circuit protection, and strict code compliance that protects your home from fire and shock. Summer is a smart time to take this project on, since the garage stays dry and workable, and you can run cable without fighting cold weather or holiday schedules. The goal is steady, safe power at every spot you use a tool, with no tripped breakers and no overheated wiring hidden behind your drywall. This guide walks through the planning, the installation steps, and the safety checks that keep your workshop running for years. Doing it right the first time costs less than fixing a rushed job later. Read on to learn how the work should be done and when it makes sense to bring in a licensed electrician.
What You Need To Know Before You Add Outlets To A Garage Workshop
Before any tool touches a wall, you need a clear plan for how much power your workshop will draw and where that power has to land. Garage circuits carry heavier and more frequent loads than a typical bedroom, since table saws, air compressors, dust collectors, and battery chargers can run at the same time. A single overloaded circuit creates nuisance trips at best and a fire hazard at worst, so the design stage matters more than the wiring stage. You also need to understand the code rules that govern garage receptacles in California, because these spaces have their own protection requirements. Permits, inspections, and correct materials all come into play here. Getting these basics settled saves hours of rework and keeps your insurance valid if anything ever goes wrong.
Planning Your Garage Workshop Outlet Layout Before You Add Outlets
Start by mapping every station in your shop and listing the tools that live at each spot. A miter saw station, a workbench, a battery charging shelf, and a welding corner all pull different amounts of current, and the layout should reflect that reality rather than spacing outlets evenly for looks. Walk the room and mark each location at a comfortable working height, usually around 42 to 48 inches above the floor so receptacles sit above your bench surface. Think about future tools too, since most workshops grow over time and adding outlets later costs far more than including them now. Group your high draw equipment so it can sit on dedicated circuits, and keep low draw items like phone chargers and shop lights on separate runs. A good layout reduces extension cord clutter, which is one of the most common causes of garage fires. Sketch the plan on paper before you buy a single box or breaker.
Once you know where the outlets go, you can count how many circuits the shop actually needs. A standard 120 volt, 20 amp circuit can handle roughly 1,920 watts of continuous load, but the safe working number sits closer to 1,440 watts once you account for the 80 percent rule electricians follow. That means a single table saw drawing 15 amps will use almost an entire 20 amp circuit on its own. Heavy tools deserve their own dedicated circuits so they never share a breaker with lighting or smaller equipment. Some machines, like large compressors, dust collectors, or a welder, run on 240 volt circuits and require their own wiring entirely. Mapping these loads now tells you how many breaker spaces your panel must supply. If your main panel is already full, the layout stage is when you discover it.
The final piece of planning is figuring out how your new outlets will get power from the panel to the garage. Short runs from a nearby panel are straightforward, yet many garages sit far from the main service, which means longer cable runs and possible voltage drop on bigger loads. A subpanel mounted inside the garage often solves both problems at once, giving you a local bank of breakers and shorter branch circuits to each outlet. This approach makes future additions easy and keeps your wiring organized in one clean location. Planning the feed also tells you what gauge of wire you need, since longer distances sometimes call for a heavier conductor to avoid voltage loss. Need help mapping power for your shop? Click here for our garage wiring service. A solid plan turns a stressful project into a smooth one.
Choosing The Right Circuit When You Add Outlets To A Garage Workshop
Picking the correct circuit starts with matching wire gauge to amperage, because the wire is the part that overheats when sizing goes wrong. A 15 amp circuit uses 14 gauge copper wire, and a 20 amp circuit uses 12 gauge copper wire, and those pairings are not optional. Putting a 20 amp breaker on 14 gauge wire is a serious code violation and a genuine fire risk, since the wire can overheat long before the breaker ever trips. Most workshop receptacle circuits should be 20 amp runs, because tools draw more than household items and the extra capacity reduces nuisance tripping. The breaker, the wire, and the receptacle all need to agree on the rating, so a 20 amp circuit should use receptacles rated for that load. Getting this match right is the foundation of a safe install. Everything else builds on top of correct conductor sizing.
Dedicated circuits are the smart choice for any tool that pulls heavy current or runs for long stretches. A dust collector, a large air compressor, and a welder each deserve their own breaker so they never compete with other equipment for power. When two big machines share a circuit, the breaker trips the moment they run together, which interrupts your work and stresses the wiring with repeated heat cycles. Dedicated 120 volt circuits cover most single tools, while 240 volt circuits serve the largest machines that simply cannot run on standard household voltage. A 240 volt circuit uses two hot conductors and delivers more power at lower current, which keeps the wiring cooler and the tool happier. Knowing which tools need 240 volts before you wire saves you from tearing open walls later. This is where a load list from your planning stage pays off.
Circuit choice also depends on what your existing panel can support, since every new circuit needs an open breaker space and available capacity. A 100 amp panel that already feeds a house may have little room left for a demanding workshop, and overloading the service creates problems far beyond the garage. This is the point where many homeowners discover they need a subpanel or even a service upgrade to handle the added load. A garage subpanel draws a single feeder from the main panel and then splits into the branch circuits your shop needs, which keeps everything balanced and code compliant. Calculating the total demand correctly prevents the dangerous mistake of stacking too much load onto an undersized service. Planning capacity now is far cheaper than rewiring a finished shop. The right circuit is the one your whole system can safely carry.
Code Requirements That Apply When You Add Outlets To A Garage Workshop
Garage receptacles fall under specific safety rules in the National Electrical Code, and California adopts these standards through its own electrical code. The headline requirement is GFCI protection, which the code mandates for all 125 volt receptacles in a garage. GFCI stands for ground fault circuit interrupter, and this device cuts power within a fraction of a second when it detects current leaking to ground, which is exactly the kind of fault that causes electrocution. Garages count as damp and potentially wet locations, and the concrete floor plus metal tools create real shock risk, so this rule exists for good reason. Skipping GFCI protection is both illegal and genuinely dangerous. Every workshop outlet you add must carry this protection in some form. There is no exception for convenience.
Tamper resistant receptacles are another modern requirement worth knowing, since the code now calls for them in many residential locations to prevent objects from being inserted into the slots. The code also sets rules for how outlets are mounted, how boxes are sized for the number of conductors inside them, and how exposed wiring must be protected. In an unfinished garage where studs and joists sit open, surface wiring usually needs to run inside conduit or be protected from physical damage, because exposed cable can be snagged or cut. Finished garage walls allow standard nonmetallic cable run inside the wall cavity, much like the rest of your home. Box fill matters more than people expect, since cramming too many wires into a small box creates heat and makes safe connections difficult. Following these details keeps your install both legal and durable. The code reflects decades of hard lessons.
Permits and inspections are the part homeowners most often skip, and that shortcut can cause serious trouble down the road. Most outlet additions that involve new circuits or panel work require a permit from your local building department, followed by an inspection that confirms the job meets code. An inspector checks your wire sizing, your GFCI protection, your box fill, your grounding, and your overall workmanship before the system gets a final sign off. Unpermitted electrical work can void your homeowners insurance, complicate a future home sale, and leave hidden hazards behind your walls. Pulling a permit also gives you a second set of expert eyes on safety, which protects your family. Want GFCI protection done to code? Click here for our GFCI outlet installation service. Doing the paperwork right is part of doing the job right.
How To Add Outlets To A Garage Workshop Safely Step By Step
With the planning done and the circuits chosen, the physical work follows a clear sequence that protects you at every stage. The single most important rule is to shut off power at the breaker before you touch any wiring, then verify the circuit is dead with a voltage tester rather than trusting the panel label. From there the job moves through running cable, mounting boxes, making connections, adding GFCI protection, and testing the finished work. Each step has its own safety checks, and rushing any of them invites mistakes that hide inside the wall. Quality materials and patient workmanship beat speed every time on an electrical project. The steps below show how a careful install comes together. Respect the power, and the power respects you.
Running The Wiring To Add Outlets To A Garage Workshop Safely
Running cable is where the plan becomes real, and the path you choose affects both safety and ease of future maintenance. In a finished garage, you fish nonmetallic cable through the wall cavities and drill through studs at the center of each member to protect the conductor from drywall screws and nails. Code requires nail plates over any hole that sits close to the face of a stud, which stops a future fastener from piercing the wire. In an unfinished garage with open framing, surface mounted conduit gives the cleanest and most protected result, since exposed cable can be damaged by tools, ladders, and stored items. Secure the cable or conduit at the spacing the code requires, and never leave long unsupported runs that sag or strain the connections. Plan your route to avoid sharp bends that can damage the conductor insulation. A neat cable run is easier to trace and safer to service.
Box selection and mounting come next, and the box must be sized for the number of wires it will hold plus the receptacle itself. Crowded boxes overheat and make it nearly impossible to fold the conductors back safely when you screw the device in place. Mount each box solidly to a stud or use an approved old work box rated for the wall type, since a loose box leads to loose connections over time. Set the box at your planned working height so the receptacle sits above your bench surface where you actually need it. Leave enough conductor length sticking out of the box, usually around six inches, so you have room to make clean connections and tuck them away. Strip only as much insulation as the connection requires, because exposed copper inside the box invites shorts. Careful boxing now prevents loose, arcing connections later.
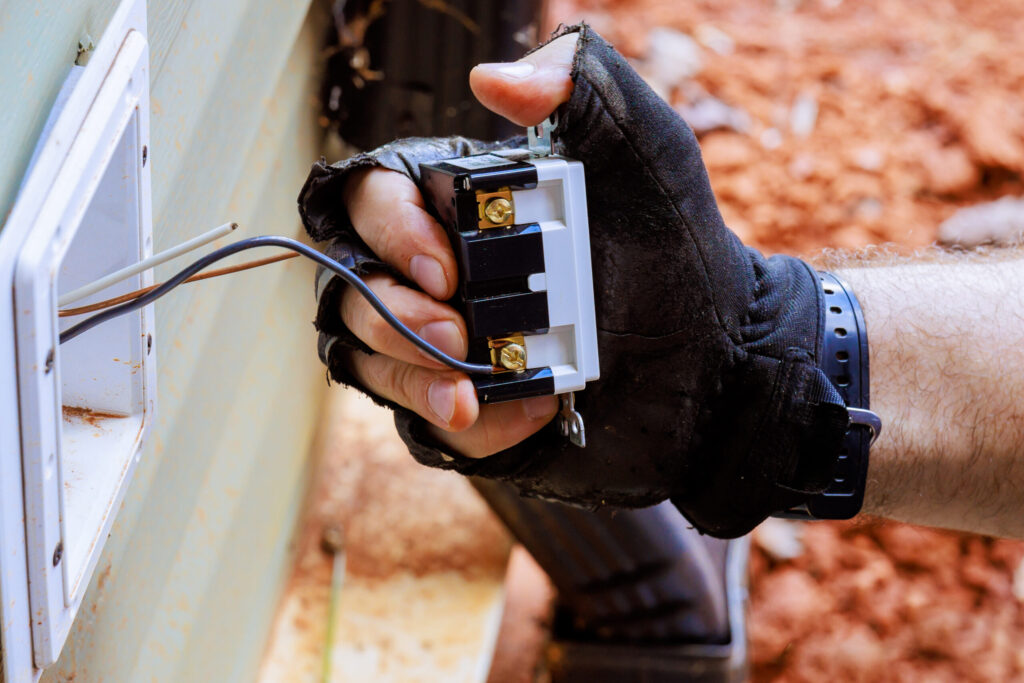
Making the connections is the heart of the job, and consistency matters as much as technique. Connect the black hot conductor to the brass terminal, the white neutral to the silver terminal, and the bare or green ground to the green grounding screw, then confirm those colors at every device. Use the screw terminals rather than the push in back stab holes, since screw connections grip the wire far more reliably and resist loosening under the vibration and load of a workshop. Tighten each terminal firmly so the wire cannot wiggle, because a loose connection generates heat that can start a fire inside the wall. Ground every metal box and pigtail the grounds together so the path to ground stays continuous through the circuit. Double check that no copper strands escape from under the screws. Solid, tight, correctly colored connections are what separate a safe install from a dangerous one.
Installing GFCI Protection When You Add Outlets To A Garage Workshop
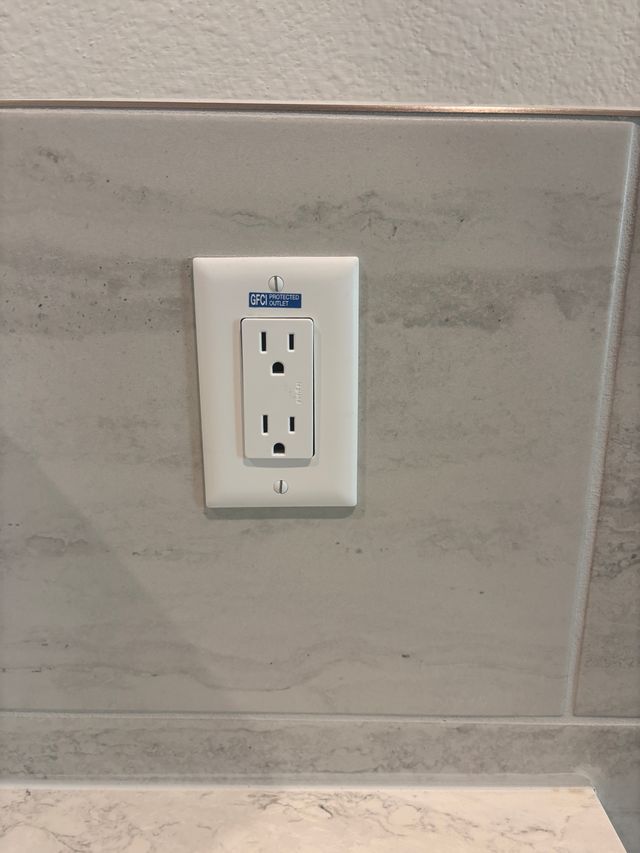
GFCI protection is the safety feature that makes garage outlets legal and, more importantly, keeps you from being electrocuted on a damp concrete floor. You can provide this protection in two main ways, and both satisfy the code when installed correctly. The first method uses a GFCI receptacle as the first device on the circuit, wired so that its load terminals feed and protect every standard outlet downstream of it. The second method uses a GFCI breaker in the panel, which protects the entire circuit from the source and lets you use standard receptacles at every location. Each approach has its place, and the right one depends on your layout and budget. Both options stop ground faults fast. Neither option is optional in a garage.
Wiring a GFCI receptacle correctly depends on respecting the line and load terminals, because mixing them up defeats the protection. The incoming power from the panel connects to the line terminals, and the wires heading to the downstream outlets connect to the load terminals, which is how a single GFCI guards several plain receptacles. Reversing these connections is a common mistake that either disables the protection or causes the device to fail its test. After wiring, you press the test button to confirm the device trips and cuts power, then press reset to restore it. A GFCI that will not trip on test is faulty and must be replaced before the circuit goes into service. Label the protected downstream outlets so anyone working on them later understands the setup. Correct line and load wiring is the difference between real protection and a false sense of safety.
GFCI devices need testing on a regular schedule even after a perfect install, since the internal electronics can wear out over time. Most manufacturers recommend pressing the test button monthly to confirm the device still trips and resets as designed. A GFCI that no longer trips offers zero protection even though it still delivers power, which is a quiet and dangerous failure mode. In a busy workshop with metal tools and moisture, this monthly habit is cheap insurance against a fatal shock. If a device trips constantly without an obvious cause, that pattern signals a real fault in the circuit or a tool, and it deserves investigation rather than annoyance. Replace any GFCI that fails its test or shows physical damage right away. Treating GFCI maintenance as routine keeps your shop genuinely safe.
Testing Your Work After You Add Outlets To A Garage Workshop
Testing turns a finished install into a verified one, and skipping this stage means trusting hidden work you never confirmed. Start by restoring power at the breaker and using a plug in outlet tester at every receptacle you installed. These inexpensive testers light up in patterns that reveal open grounds, reversed polarity, open neutrals, and other wiring faults in seconds. Correct any fault the tester flags before you put a single tool into service, since these errors hide behind a working light and an outlet that seems fine. Check each GFCI location with the tester’s trip function to confirm the protection responds. A clean pass at every outlet tells you the connections inside the boxes are correct. Verification is the step that catches the mistake you did not know you made.
Load testing follows the basic checks, because an outlet that works for a phone charger can still fail under a real tool’s demand. Plug in the actual equipment that will live at each station and run it, watching for warm faceplates, flickering lights, or a breaker that trips under load. A warm receptacle or a buzzing sound points to a loose connection or an undersized conductor, both of which need immediate attention. Run your heaviest tools to confirm the dedicated circuits hold steady without nuisance trips. If a breaker trips the moment two tools run together, your load planning needs adjustment, and the circuit may need to be split. Watching the system perform under genuine workshop conditions reveals problems that a quick poke test never would. Real loads tell the real story.
Final documentation and labeling complete the job and pay off for years afterward. Label every breaker in the panel clearly so the next person knows which circuit feeds which part of the shop, since an unlabeled panel turns a simple repair into a guessing game. Mark the GFCI protected outlets and note any dedicated circuits in your records. Keep your permit and inspection paperwork in a safe place, because that documentation proves the work was done to code and protects you at resale. If you ran a subpanel, note its capacity and what each branch feeds. Want a clean subpanel for your shop? Click here for our electrical subpanel installation service. Good records turn a one time project into a system you can maintain with confidence.
Why You Need A Licensed Electrician To Add Outlets To A Garage Workshop
Adding outlets to a garage workshop combines load calculation, code knowledge, and hands on skill that takes years to develop, and the stakes are too high for guesswork. A mistake here is not a cosmetic flaw, it is a fire risk and a shock hazard hidden inside your walls where you cannot see it. A licensed electrician brings the training, the tools, and the permit access that turn a risky DIY job into a safe and inspected system. The work also has to satisfy your local inspector, who holds professionals to a clear standard. Hiring a pro protects your home, your family, and your investment in the shop itself. Here is why that choice pays off.
The Safety Benefits Of Hiring A Pro To Add Outlets To A Garage Workshop
A licensed electrician understands the failure points that cause garage fires, and that knowledge shapes every connection they make. They size conductors correctly, torque terminals to specification, and provide GFCI protection that actually performs under fault conditions. Years of field experience teach a professional to spot the subtle warning signs of an overloaded panel or a marginal connection that a homeowner would never notice. They also carry the testing equipment that confirms the work is sound rather than just hoping it is. That combination of skill and verification is what keeps your family safe from shock and your home safe from fire. Safety is not a feature you add later, it is built into the work from the start.
A professional also stands behind their work in a way that a weekend project never can. When a licensed electrician completes your outlets, the install carries accountability, proper permits, and an inspection that confirms code compliance. That paper trail matters if you ever sell your home or file an insurance claim, since unpermitted electrical work can derail both. A pro also carries liability insurance, which means you are protected if something goes wrong rather than left holding the risk alone. This layer of protection turns your investment into a documented, defensible improvement. Peace of mind has real value when the alternative is hidden danger.
Beyond the install itself, an electrician sees the bigger picture of your home’s electrical system and how the new shop load fits into it. They notice when your panel is near capacity, when your grounding is weak, or when an older circuit needs attention before you add to it. This whole system view prevents the common mistake of solving one problem while quietly creating another. A pro can recommend a subpanel, a service upgrade, or a smarter circuit layout that serves you for decades. That foresight saves you from a second round of work and the expense that comes with it. A trained eye catches what a checklist alone cannot.

How A Professional Saves You Money When You Add Outlets To A Garage Workshop
Hiring a professional often costs less in the long run, even though the upfront price looks higher than a DIY attempt. A correctly sized and installed circuit avoids the repeated breaker trips, overheated wiring, and damaged tools that a botched job creates. Mistakes in electrical work are expensive to fix, since the repair usually means opening finished walls, redoing connections, and paying for a second inspection. A pro gets it right the first time, which means you pay once rather than twice. The cost of doing it correctly is almost always lower than the cost of doing it over. Quality work is the budget friendly choice over time.
A professional also helps you avoid the hidden costs that homeowners rarely see coming. Unpermitted work can void an insurance claim, stall a home sale, or trigger a forced rework when an inspector finally catches it. Damaged tools from bad power, ruined motors from low voltage, and the lost time of a shop that keeps tripping all add up to real money. An electrician designs the system to handle your loads cleanly, which protects the expensive equipment that fills your shop. That protection alone can outweigh the cost of the install. Smart wiring guards every dollar you have invested in tools.
Efficiency is the final way a professional saves you money, since correct circuit design reduces wasted energy and unnecessary trips. A pro right sizes your conductors to limit voltage drop, which keeps your tools running at full power and your motors running cool. They also help you plan for the future so you are not paying to rewire the same garage again in two years. Bundling related work, like a subpanel and several circuits, into one visit costs less than calling someone back repeatedly. Want a properly sized circuit and breaker? Click here for our circuit breaker installation service. One well planned project beats a string of expensive patches.
Why Choose Good Neighbors Electric To Add Outlets To A Garage Workshop
Good Neighbors Electric brings licensed and insured professionals to every job, and that credential is your first layer of protection on any electrical project. We earned recognition as a recipient of Best of the Central Coast for electrical services, which reflects the standard we hold on every install. Our team treats your home with respect, keeping clean and organized job sites and protecting your property from start to finish. We waive the dispatch fee when you move forward with the work, which keeps the process fair and transparent. We are dedicated to delivering a five star service on every visit. Your shop deserves a team that takes the work seriously.
We back our new installations with a two year workmanship warranty, which means we stand behind the outlets we add to your garage long after the job is done. That warranty reflects our confidence in the quality of our work and our commitment to the customers we serve across the Central Coast. From Atascadero and Paso Robles to San Luis Obispo and the coastal towns, we serve a wide service area with the same care and attention everywhere we go. We take ethos seriously, and that shows in how we communicate, how we price, and how we finish. You get straight answers and dependable work. That is the relationship we aim to build.
When you are ready to power your garage workshop the right way, Good Neighbors Electric is ready to help. You can reach us at our office at 8778 Plata Ln, Atascadero, CA 93422, give us a call at (805) 610-5530, or send a message to anthony.orozco@goodneighborselectric.com. We will walk your space, map your loads, and design a system that runs your tools safely for years. Our licensed electricians handle the permits, the wiring, and the inspection so you can focus on building. Need expert garage wiring? Click here for our garage wiring service. Let us help you build a shop that has power exactly where you need it.