
How To Wire A Detached Garage For Power And Lighting
Wiring a detached garage for power and lighting is a project many homeowners across the Central Coast take on as workshops, hobby spaces, and storage needs grow. A detached garage needs its own dedicated electrical feed from the main house panel, properly buried conductors, a subpanel inside the structure, and branch circuits that handle outlets, overhead lighting, and any large equipment you plan to run. This work falls under the National Electrical Code and California state amendments, which means trenching depths, conductor sizing, grounding electrodes, and GFCI protection all have strict requirements. Skipping a step can leave your garage underpowered, create shock hazards, or fail inspection during a future home sale. The good news is that with proper planning, a detached garage can be wired to support everything from a single light bulb to a full woodshop with a welder and an EV charger. This guide walks through how to wire a detached garage for power and lighting from trench to finished circuit, with the safety steps and code points that matter most in Atascadero and the surrounding Central Coast communities.
Planning The Detached Garage Wiring Project From Main Panel To Subpanel
Every successful detached garage wiring job starts with load calculation and a clear plan for how power will leave the main house panel, travel underground, and land inside a properly sized subpanel. You need to total up the amperage of lights, receptacles, garage door openers, air compressors, EV chargers, and any 240-volt tools before you ever pick up a shovel. That total tells you the size of the feeder breaker at the main panel, the gauge of the conductors running through the trench, and the amp rating of the subpanel you will mount inside the garage. Most modern detached garages are wired with a 60-amp or 100-amp subpanel fed by aluminum or copper conductors in PVC conduit. Pulling a permit through San Luis Obispo County or your local city building department is required, and an inspector will check trench depth, conductor type, grounding, and panel labeling before you backfill or close walls. Doing this planning step correctly protects your investment and keeps the garage safe for decades.
A Complete Detached Garage Wiring Load Calculation
A load calculation for detached garage wiring follows Article 220 of the National Electrical Code and considers both general lighting loads and any specific appliances or tools you plan to install. General lighting and receptacle loads are calculated at 3 volt-amperes per square foot for garages and accessory structures, then added to nameplate ratings for fixed equipment like welders, dust collectors, or air compressors. If you plan to install an EV charger, that single circuit can add 32 to 48 amps of continuous load by itself, which often pushes a subpanel from 60 amps up to 100 amps. Continuous loads, meaning anything running for three hours or more, must be calculated at 125 percent of their rated value per NEC 210.19. Future expansion should also be considered, since trenching and pulling new feeder conductors later is expensive and disruptive. A licensed electrician will document this calculation on paper for the permit application and use it to size every component of the detached garage electrical system.
Choosing between a 60-amp and 100-amp subpanel is one of the biggest decisions in any detached garage wiring project. A 60-amp subpanel works well for garages used mainly for parking, basic lighting, a few outlets, and a small workshop with hand power tools. A 100-amp subpanel becomes necessary once you add an EV charger, a 240-volt air compressor, a welder, a mini-split heat pump, or a tankless water heater. The cost difference between the two feeder sizes is often small compared to the labor of re-trenching later, which is why most electricians recommend sizing up when there is any question about future use. The main panel at the house must also have enough spare capacity to feed the subpanel, and a service upgrade may be needed if the existing 100-amp or 125-amp main service is already loaded. A load calculation tells you exactly which path to take. Need help sizing your detached garage electrical system? Click here for our electrical subpanel installation service.
The Detached Garage Wiring Permit And Inspection Process
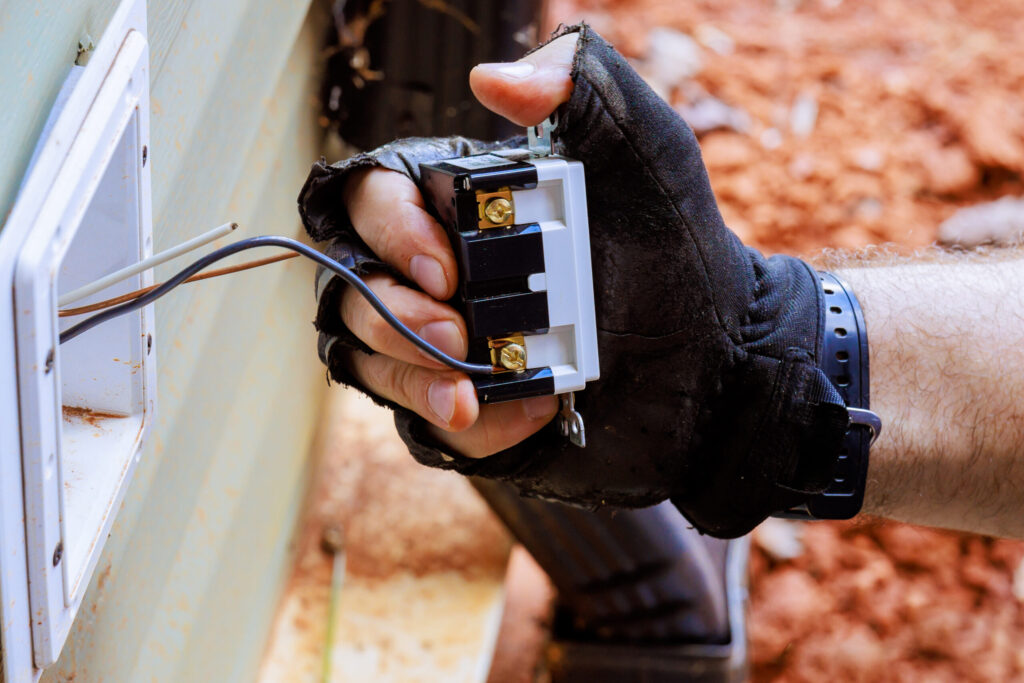
Permits for detached garage wiring are issued by the city or county building department where the property is located, and the process protects homeowners from unsafe installations. The permit application requires a site plan showing trench routing, a one-line electrical diagram, the load calculation, and the planned subpanel location. In San Luis Obispo County and cities like Atascadero, Paso Robles, and Templeton, the inspector will visit at least twice: once for the open trench and rough wiring, and once for the final installation with covers on and breakers labeled. Skipping the permit is a common mistake that creates problems later when selling the home, since unpermitted electrical work must often be torn out and redone before close of escrow. Insurance companies also have the right to deny claims tied to unpermitted electrical work after a fire or shock incident.
The open-trench inspection is the most important step in the entire detached garage wiring process because it is the only chance to verify conduit depth, conductor type, and bedding before everything gets buried. Inspectors measure trench depth from the top of the conduit, not the bottom, and PVC conduit must be at least 18 inches deep under most conditions per NEC Table 300.5. Direct-burial UF cable requires 24 inches of cover, and rigid metal conduit can sometimes be placed shallower. Sand bedding, warning tape, and proper sweep fittings at each end of the run are all checked at this stage. Once the inspector signs off, the trench can be backfilled and the rest of the work can continue.
The final inspection focuses on the subpanel inside the garage, the grounding electrode system, the GFCI and AFCI protection on branch circuits, and proper labeling. Every breaker must be clearly marked with the circuit it controls, and the subpanel cover must show the panel directory filled out completely. The grounding electrode at the detached structure, usually one or two 8-foot copper-clad ground rods, must be tied to the subpanel ground bar with a continuous copper conductor of the proper size. Neutrals and grounds must be separated at the subpanel, which is one of the most common errors found on detached garage wiring jobs done without a licensed electrician. Passing final inspection means the system is safe, code-compliant, and ready for years of reliable use.
A Smart Detached Garage Wiring Budget And Timeline
Budgeting for detached garage wiring depends on trench length, subpanel size, branch circuit count, and ground conditions on your property. A typical 60-amp feeder run of 50 to 75 feet through soft soil with a basic 4-circuit subpanel and standard lighting will fall in one range, while a 100-amp feeder run of 150 feet through rocky Central Coast hillside with a 12-circuit subpanel, EV charger, and LED shop lighting will fall in a much higher range. Trenching is often the single biggest variable, since rock, tree roots, existing irrigation lines, and concrete crossings all add labor hours. Conductor cost has also climbed in recent years, with copper feeders costing significantly more than aluminum equivalents of the same ampacity. Getting a detailed written estimate from a licensed electrician avoids surprises and lets you compare options like aluminum versus copper or PVC versus rigid conduit.
Timeline for a detached garage wiring project usually runs three to seven working days from start to finish, plus permit processing time at the front end. Day one is typically locating utilities through USA North 811, marking the trench path, and starting excavation. Days two and three cover trenching, conduit installation, conductor pulling, and rough wiring inside the garage. The open-trench inspection happens before backfill, which can add a day depending on inspector availability. Days four through six cover subpanel installation, branch circuit wiring, fixture mounting, device installation, and final cleanup, with the final inspection scheduled once everything is complete.
Weather and soil conditions on the Central Coast can shift this timeline, especially during winter rains in Cambria, Cayucos, and Morro Bay where saturated trenches must be pumped out before conduit can be laid. Summer dry conditions in Paso Robles and Shandon make trenching faster but increase the risk of caliche layers that require special equipment. Planning the project for spring or fall often gives the best balance of workable soil and predictable weather. Coordinating with concrete contractors, drywall finishers, or solar installers also affects the schedule, since electrical rough-in must happen before walls close up but after the slab and framing are complete. A licensed electrician manages all of these moving pieces and keeps the project on track.
How To Run Power From The House To A Detached Garage Safely
Running power from the main house panel to a detached garage is the most technical part of the project and the part most likely to fail inspection when done incorrectly. The feeder conductors must be sized for the subpanel amperage, protected by the correct breaker at the main panel, buried at the proper depth, and properly grounded at the detached structure. Voltage drop becomes a real concern when the run exceeds 100 feet, since long copper or aluminum conductors lose voltage under load and can cause motors, LED drivers, and EV chargers to perform poorly. The choice of conduit, the use of sweeps instead of sharp elbows, and the pulling lubricant all affect how easily the wire can be installed and how long it will last. Getting this part right is what separates a professional detached garage wiring job from a problem waiting to happen.
The Detached Garage Wiring Trench And Conduit Installation
Trenching for detached garage wiring starts with a utility locate through USA North 811, which is required by California law at least two working days before any digging begins. The locate service marks gas, water, sewer, cable, and existing electrical lines in the planned trench path so you can route around them safely. A standard trench for a 60-amp or 100-amp feeder is 24 inches deep and 8 to 12 inches wide, which gives enough room to lay PVC conduit with sand bedding underneath and warning tape 12 inches above. Crossings under driveways, sidewalks, or patios often require deeper trenches or sleeve protection, and any change in direction needs a long-radius sweep fitting rather than a tight 90-degree elbow. Pulling wire through tight elbows in long runs is one of the fastest ways to damage insulation and fail an inspection.
Schedule 40 PVC conduit is the most common choice for detached garage feeders in the Central Coast because it resists corrosion, handles soil chemistry well, and accepts solvent-welded fittings that create a watertight system. Schedule 80 PVC is required where the conduit emerges from the ground at both ends, since the thicker wall resists damage from string trimmers, shovels, and lawn equipment. Conduit must be glued at every joint, supported within 3 feet of each box or termination, and sloped slightly to allow condensation to drain. Bell-end fittings at the entry to each pull box prevent insulation damage as wire is fed through, and a pull string is run during conduit assembly so the conductors can be pulled in one smooth motion. Skipping the pull string almost always means cutting the conduit open later, which is expensive and ugly.
Backfilling the trench is more than just dumping dirt back in. The bottom 4 inches should be sand or fine soil free of rocks, the conduit laid in carefully, then another 4 inches of sand or fine soil placed over the top before native soil goes back. Detectable warning tape, usually red with the words “Caution Electric Line Below,” is buried 12 inches above the conduit so future digging crews are alerted before they hit the line. Compacting the soil in 6-inch lifts prevents settling that can crack conduit or pull conductors tight at the ends. Finishing the surface with the original landscaping, gravel, or concrete restoration completes the trench portion of the detached garage wiring project.
A Proper Detached Garage Wiring Subpanel Installation
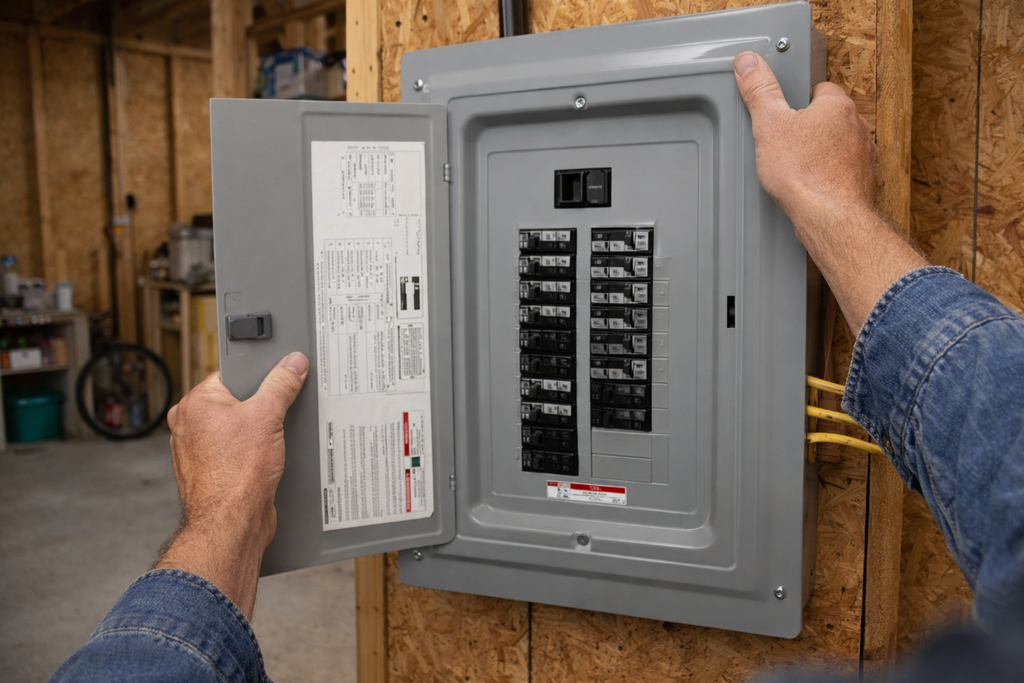
The subpanel inside a detached garage is the heart of the electrical system and must be installed with the same care as the main panel at the house. Mounting height puts the top breaker no higher than 6 feet 7 inches above the floor per NEC 240.24, with at least 3 feet of clear working space in front of the panel and 30 inches of clear width. The panel must be securely fastened to the wall, and the feeder conduit must enter through a proper knockout with a watertight connector if the panel is in a damp location. Conductors are landed on the lugs with the correct torque value, usually printed on a label inside the panel, and a torque screwdriver is the only reliable way to hit those values. Loose lugs cause heat, arcing, and eventual failure of the panel.
Neutral and ground separation at the detached garage subpanel is one of the most misunderstood code requirements and one of the most important. At the main panel in the house, the neutral bar and ground bar are bonded together because that is where the grounded service conductor is established. At a detached structure subpanel, the neutral bar must float, meaning it is not bonded to the enclosure or the ground bar. A separate ground bar is added to the subpanel and bonded to the enclosure, and the equipment grounding conductor from the feeder lands there along with the grounding electrode conductor from the ground rods. Mixing neutrals and grounds at the subpanel creates parallel paths that can energize metal surfaces and trip GFCI devices unexpectedly.
The grounding electrode system at a detached garage is its own complete system, separate from the one at the main house. NEC 250.32 requires that any detached structure supplied by a feeder with one or more branch circuits have a grounding electrode connected to the equipment grounding conductor of the subpanel. Two 8-foot copper-clad ground rods spaced at least 6 feet apart are the most common solution, connected by a continuous bare copper conductor of the proper size, usually 6 AWG. The connection at each rod uses an approved acorn clamp or exothermic weld, and the conductor runs unbroken to the ground bar inside the subpanel. This local grounding electrode protects the garage from lightning, line surges, and ground faults independently of the main house grounding system.
Need a licensed electrician for your detached garage feeder and subpanel? Click here for our electrical wiring service.
The Detached Garage Wiring Branch Circuits And Lighting Layout
Branch circuits in a detached garage start with the basics: receptacles, lighting, and the garage door opener, then expand to cover whatever specialty equipment you plan to use. A typical garage layout includes one 20-amp circuit for general-use receptacles along the walls, one 15-amp or 20-amp circuit for overhead lighting, and a dedicated circuit for the garage door opener. Heavier loads like air compressors, welders, dust collectors, and EV chargers each get their own dedicated circuit sized to the nameplate rating of the equipment. NEC 210.8(A) requires GFCI protection on all 125-volt, single-phase, 15- and 20-amp receptacles in garages and accessory buildings, which can be provided at the breaker or at the first receptacle in the circuit. AFCI protection is also required on most 15- and 20-amp branch circuits supplying receptacles in dwelling-related garages.
Lighting layout in a detached garage benefits from LED shop fixtures spaced to give even illumination across the entire floor without dark corners or harsh glare. A two-car detached garage of about 400 square feet typically needs 8,000 to 12,000 lumens of total light output, which can be delivered by four to six 4-foot LED shop fixtures rated at 4,000 to 5,000 Kelvin color temperature. Switching is usually done at each entry door with three-way switches if there are two doors, and motion sensors can be added inside or outside for hands-free operation when carrying tools or groceries. Exterior lighting at the man door, vehicle doors, and any side entries adds safety and curb appeal, and dusk-to-dawn photocell controls reduce energy use compared to leaving lights on manually.
Receptacle placement in a detached garage follows the same logic as kitchen and laundry rooms: put outlets where you actually need them, not just at code-minimum spacing. Workbench areas benefit from a row of receptacles every 4 feet at counter height, often fed from two or more circuits so a saw and a vacuum can run at the same time without tripping a breaker. Ceiling receptacles for the garage door opener, retractable extension cord reels, and air hose reels keep cords off the floor and reduce trip hazards. A dedicated 240-volt receptacle at the most likely EV parking spot, even if a charger is not installed yet, makes future EV charger installation a simple plug-in instead of a full circuit run. Planning these locations during rough wiring is far cheaper than adding them after drywall.
Why You Need A Licensed Electrician For Detached Garage Wiring
Detached garage wiring touches every part of an electrical system, from the main service panel down to the smallest branch circuit, and mistakes can be hidden for years before they cause a fire or shock. California requires that any electrical work beyond simple device replacement be performed by a licensed C-10 electrical contractor, and most cities and counties on the Central Coast enforce this through their permit process. A licensed electrician carries liability insurance, workers compensation, and a state license that proves they have passed exams on the National Electrical Code and California amendments. Hiring a licensed pro protects your home value, your insurance coverage, and your family. Good Neighbors Electric is licensed, insured, and serves Atascadero, Paso Robles, Templeton, San Luis Obispo, and the surrounding Central Coast communities every day.
A Detached Garage Wiring Project Done Right The First Time
A detached garage wiring project done right the first time saves money, time, and stress compared to fixing problems after the fact. Properly sized feeders, correct trench depth, separated neutrals and grounds at the subpanel, and code-compliant GFCI and AFCI protection on branch circuits are the foundation of a system that will serve your garage for 40 years or more. A licensed electrician knows the local amendments that apply in San Luis Obispo County, the inspector preferences in cities like Atascadero and Paso Robles, and the supply houses that stock the right materials. That knowledge speeds up the project and avoids the back-and-forth that frustrates do-it-yourself attempts. The finished system is safe, permitted, and ready for whatever you want to plug into it.
Choosing a licensed electrician also means the work carries a warranty that protects you long after the job is complete. Good Neighbors Electric backs every new installation with a 2-year workmanship warranty, which covers the labor and workmanship of the detached garage wiring project. That warranty is only possible because the work is permitted, inspected, and performed by trained electricians who follow the National Electrical Code and California state amendments. Unlicensed handymen and online tutorials cannot offer that kind of protection. The warranty is one more reason why hiring a licensed pro pays for itself.
The finished detached garage becomes a functional extension of your home, ready to serve as a workshop, gym, hobby space, EV charging station, or storage building with proper lighting and outlets exactly where you need them. The investment in professional detached garage wiring adds value to your property and supports modern needs like electric vehicles, home gyms with powered equipment, and remote work spaces. Future buyers see a permitted, properly wired detached garage as a major plus during a home sale. The project pays back in daily convenience and long-term value.
The Detached Garage Wiring Safety Standards That Matter
Detached garage wiring safety standards exist because electrical fires and shock incidents are preventable when the code is followed. GFCI protection on garage receptacles prevents shock when wet hands touch a tool or when a damaged cord contacts a metal workbench, since the GFCI device cuts power within milliseconds of detecting a ground fault. AFCI protection senses the arcing signature of damaged wiring, loose connections, and pinched cables, then trips before the arc has time to ignite surrounding materials. Together, GFCI and AFCI protection address the two most common causes of residential electrical fires and shocks, which is why the code requires them in garages and accessory structures.
Grounding and bonding at the detached garage tie every metal part of the electrical system to earth, so a fault anywhere in the system has a low-resistance path back to the source and trips the breaker quickly. Ground rods at the detached structure, properly sized grounding electrode conductors, separated neutrals and grounds at the subpanel, and bonded metal water and gas piping all work together as a system. A break anywhere in that chain leaves metal surfaces potentially energized during a fault, which is how people get shocked touching a metal garage door track or a tool chest. Following NEC 250 grounding and bonding requirements is not optional; it is the difference between a safe system and a hidden hazard.
Working space, clearances, and labeling requirements at the subpanel matter for the safety of every electrician who works on the system in the future. A 30-inch wide, 3-foot deep working space in front of the panel gives room to open the cover, test circuits, and replace breakers without contorting around obstacles. Clear labeling of every breaker means future work happens on the right circuit instead of a guess, and dead-front covers protect anyone in the garage from accidentally touching live bus bars. These details are easy to skip during construction but impossible to add later without significant rework. Doing them right during the initial detached garage wiring installation is the only practical option.
Why Choose Good Neighbors Electric For Detached Garage Wiring
Good Neighbors Electric has earned the trust of Central Coast homeowners by treating every detached garage wiring project with the same care as the main panel in the home. The team is licensed, insured, and trained on the latest National Electrical Code and California state amendments, which means every job is permitted, inspected, and built to last. Job sites are kept clean and organized, with respect for your property from the first trench mark to the final cleanup. The dispatch fee is waived when you move forward with the work, so getting a professional estimate costs nothing.
The Best Of The Central Coast award for electrical services reflects the kind of work Good Neighbors Electric delivers on every project, including detached garage wiring. Every new installation carries a 2-year workmanship warranty, giving homeowners confidence that the system will perform as designed for years to come. The team serves Atascadero, Paso Robles, Templeton, San Luis Obispo, Morro Bay, Cambria, Pismo Beach, Arroyo Grande, and the surrounding Central Coast communities with the same five-star service that built the company reputation. Local roots mean local accountability.
Ready to wire your detached garage for power and lighting? Click here for our electrical subpanel installation service or call (805) 610-5530 to schedule a free in-home consultation. The team at Good Neighbors Electric will review your goals, calculate the load, design the system, pull the permit, and complete the work to code with the warranty and craftsmanship you expect. From a simple lighting upgrade to a full 100-amp subpanel with an EV charger, the project is in good hands. Good Neighbors Electric is the licensed, insured, and trusted choice for detached garage wiring on the Central Coast.